Build a Token Swap App (AllowanceHolder)
This guide gives you a tour of the Swap API demo app built on Next.js with AllowanceHolder. It covers the core concepts that can be easily transferred into any token swapping app.
⚡️ Quicklink: Swap API v2 AllowanceHolder demo repo
What we will build
This example app demonstrates the same core principles used in production app such as Matcha.xyz:
- Fetch indicative prices via
/swap/allowance-holder/price - Get firm quotes via
/swap/allowance-holder/quote - Approve token allowances for AllowanceHolder
- Submit transactions
Video tutorial version here:
Pre-requisites
You should be familiar with:
We’ll build our token swap app on Base, but you can adapt it to any supported chain.
Core Concepts
To build our swap app, we’ll focus on:
- 🌈 RainbowKit
- 🏷 PriceView
- 💸 QuoteView
- 🪙 Token lists
What is it?
These components are transferable to almost any token swapping app being built.

🌈 RainbowKit
What is it?
RainbowKit is a React library that makes it easy to add wallet connection to your app. We are using their Next.js App Router example in our app.
Check out their installation instructions to understand the configurations. You can configure your desired chains and generate the required connectors.
Code
Setup WalletConnect projectId in providers.tsx
RainbowKit relies on WalletConnect. Obtain a free projectId from WalletConnect Cloud and replace the key in the .env file.
// Inside /swap-v2-next-app/.env
# To get a RainbowKit relies on WalletConnect, get a free projectId here:
# https://cloud.walletconnect.com/app
NEXT_PUBLIC_WALLET_CONNECT_PROJECT_ID="ADD_YOUR_KEY"
// Inside /app/providers/tsx
const projectId = process.env.NEXT_PUBLIC_WALLET_CONNECT_PROJECT_ID as string; // Uses your free key setup in .env
🏷 PriceView
What is it?
This component is for users to browse for a price without committing to a trade, aka, get the indicative price. An indicative price is used when users just want to check the price they could receive on a trade, for this we will use the /swap/allowance-holder/price endpoint.
Later on in the QuoteView, when a user is actually ready to make a trade, the app will ping /swap/allowance-holder/quote which returns an order that is ready to submitted on-chain.
This is also important because /quote returns back an order in which a Market Maker must commit their assets to settle that trade. So if we ping /quote too much when we really are just asking for a price and not ready to submit an order, then this can clog up the system!
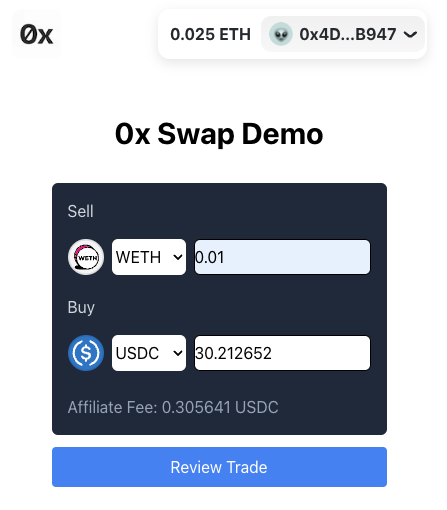
UX flow
Select tokens
- User chooses the sell token and buy token from token selectors.
Enter amount
- User inputs the sellAmount.
- The app immediately fetches a price quote (even if no wallet is connected).
- The UI displays the corresponding buyAmount.
Connect wallet
- User connects via RainbowKit.
- If needed, they are prompted to switch to the correct network (e.g. Base).
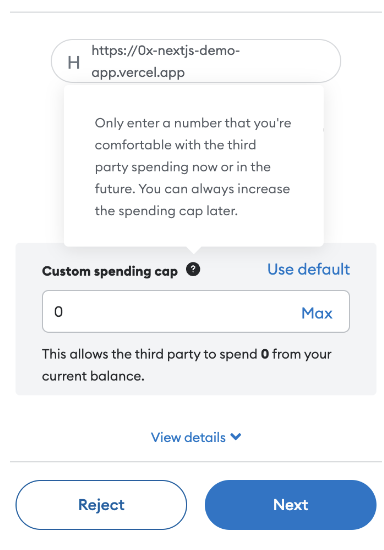
Approve token allowance
- If the user has enough of the sell token, the button changes to “Approve”.
- Approving grants the required allowance to AllowanceHolder so the app can transfer ERC-20 tokens on the user’s behalf.
- Users can set either the default (large) allowance or a custom amount equal to their balance.
Review and confirm
- Once the allowance is approved, the button changes to “Review Trade”.
- User reviews final trade details and proceeds to confirm the swap.
Code
The code for this component lives in /app/components/price.tsx. The logic for when the component appears in UI is in /app/page.tsx, it is displayed if the user has not clicked "Review Trade" to finalize the price.
Fetch price with /swap/allowance-holder/price
The price is fetched using /swap/allowance-holder/price. This API request is wrapped behind /app/api/price/route.ts and triggered in the UI by useEffect here in /app/components/price.tsx
Wrapping our API key protects it because all API requests are viewable by if someone inspects the browser, but we don’t want them inspecting an finding our keys. Instead, when the user queries for an indicative price, it pings our API setup in /app/api/price/route.ts and that pings the Swap API using our API key in the header.
This example uses a demo key which should not be used in production or outside of this demo; however, you can get your own key by going from the 0x Dashboard and following the Getting Started guide.
In addition, we use Next.js App Router's built-in data fetching pattern and the useEffect hook to make the request. By using useEffect, we will get a stream of data updates constantly and automatically, and the UI will quickly respond to any changes, such as when the user inputs a new sellAmount.
Token Allowances & Approvals
Important: Read Before Using 0x API
NEVER set an allowance on the Settler contract. Doing so may result in unintended consequences, including potential loss of tokens or exposure to security risks. The Settler contract does not support or require token allowances for its operation. Setting an allowance on the Settler contract will lead to misuse by other parties.
ONLY set allowances on AllowanceHolder or Permit2 contracts, as indicated by the API responses.
The correct allowance target is returned in
issues.allowance.spenderorallowanceTarget.
Before placing a trade on the PageView, users must set allowances on all tokens involved. A token allowance lets a third party move funds on your behalf. Essentially, you permit them to move your tokens.
In our case, we want to approve an allowance for AllowanceHolder contract to trade our ERC20 tokens for us. To do this, we need to approve a specific allowance, allowing this contract to move a certain amount of our ERC20 tokens on our behalf. Read more about token allowances
The logic to check if the user has approved a token allowance the selected sell token is setup in /app/components/price.ts.
- First, we need to check if the spender (AllowanceHolder) has an allowance already. We can use wagmi's
useReadContract()hook to read from the sellToken's "allowance" function. - If there is no allowance, then we will write an approval to the sellToken's smart contract using wagmi's
useSimulateContract()anduseWriteContract(). - Lastly, use wagmi's
useWaitForTransactionReceipt()to wait for the approval transaction to complete
Be aware that approvals cost gas. Looking for a gasless approach? Check out Gasless API.
Need to quickly revoke an allowance while testing? To revoke an allowance, you can set the allowance to 0. This can be done programmatically or through a UI such as https://revoke.cash/ .
💸 QuoteView
What is it?
The QuoteView component provides users with an overview of the transaction details before executing the token swap. Earlier in the PriceView, we provided users an indicative price because they were just browsing for pricing information, so did not need a full 0x order. On the QuoteView, users are ready to fill the order, so we need to provide them a firm quote, and the Market Makers can know to reserve the proper assets to settle the trade.
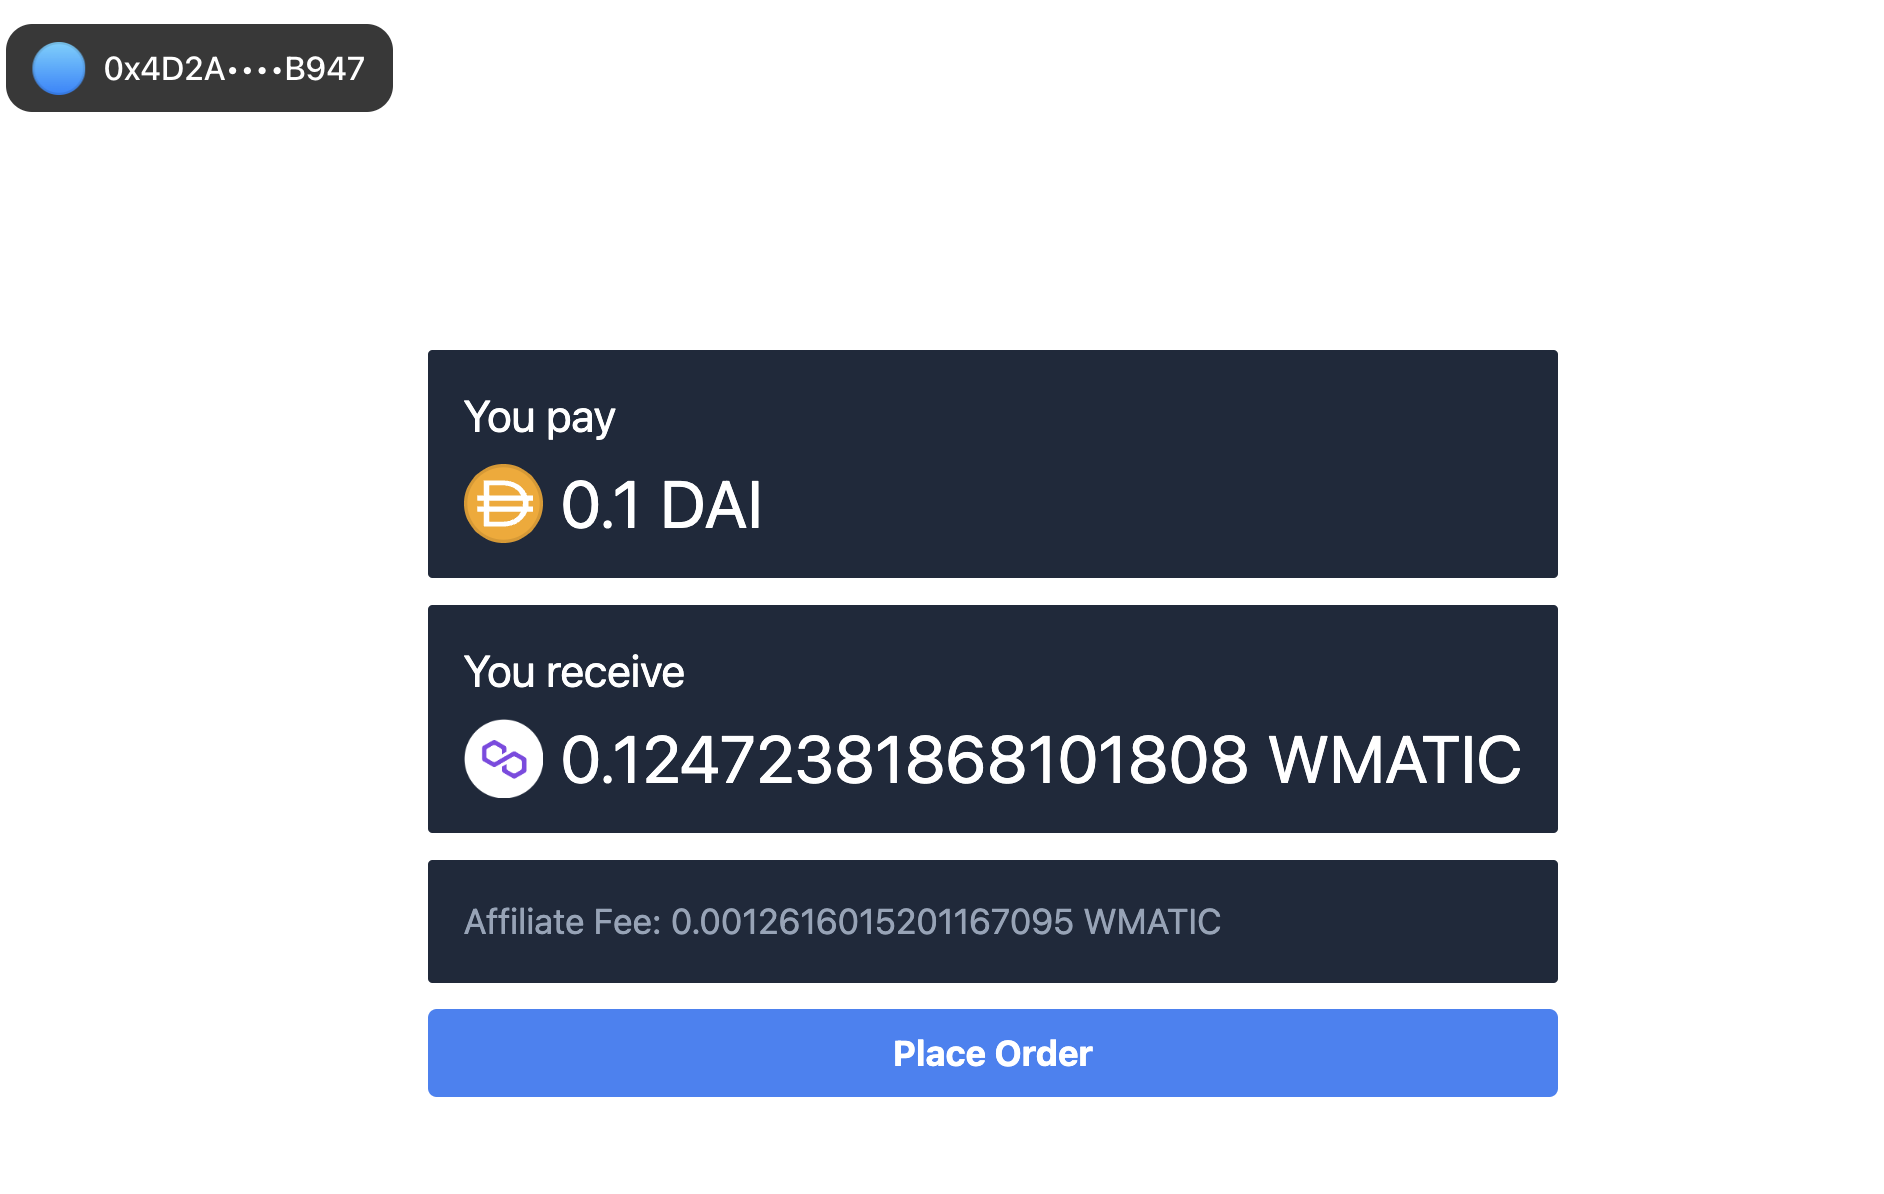
UI/UX Walk-through
- Displays the sell and buy Amounts that the user pays and receives, respectively
- I’ve formatted it but you can get the symbols, decimal points for formatting from the token list. The amounts are the buy and sell Amounts returned from the quote
- From here, the user can “Place Order” which creates, signs, and sends a new transaction to the network.
Code
The code for this component lives in /app/components/quote.tsx. The logic for when the component appears in UI is in /app/page.tsx, it is displayed if the user has approved the token allowance, and clicked "Review Trade" to finalize the trade selection.
Submit the transaction to the network
The last step is to submit the transaction with all the required parameters using your preferred web3 library (e.g. wagmi, viem, ethers.js, web3.js). In this example, we use wagmi's useSendTransaction.
Pass the required params we get from the quote response to sendTransaction. Code here.
sendTransaction({
    account: walletClient?.account.address,
    gas: !!quote?.transaction.gas ? BigInt(quote?.transaction.gas) : undefined,
    to: quote?.transaction.to,
    data: quote?.transaction.data,
    chainId: chainId,
});
🪙 Token lists
What is it?
Token Lists allow users to select their desired tokens for swapping. For ERC20 tokens, these lists typically include crucial metadata - such as the token names (Wrapped Ether), symbol (ETH), address, and logoURI - which can be leveraged by apps such as ours.
Thankfully there are several established sources that curate and open-source this information. As developers, we can choose to ingest the entire list or customize our own token lists based off of these sources.
Notable lists
- Trust Wallet: https://github.com/trustwallet/assets/tree/master/blockchains
- Polygon Assets github: https://github.com/maticnetwork/polygon-token-assets/tree/main/assets/tokenAssets
- Tokenlists: https://tokenlists.org/
- Coin Gecko: https://tokenlists.org/token-list?url=https://tokens.coingecko.com/uniswap/all.json
Code
In our demo, we curated a token list in /src/constants.ts. In production level apps, it's common practice to maintain a token list since some apps don't support all available tokens.
Monetize your swap integration
And as your business grows, Swap API offers low-friction ways to monetize your products.
Web3 teams can leverage Swap API to unlock new revenue streams by easily tapping into affiliate fee and trade surplus features. Regardless of whether you’re on a free or paid plan, monetization options are available to all integrators.
Swap API offers two monetization options out-of-the-box:
- Collect affiliate fees (i.e. trading fee or commission) ← shown in this demo app
- Collect trade surplus 1 (i.e. positive slippage)
For more details about monetizing, check out the How to monetize your app using 0x Swap API guide which discusses pricing considerations and shows code samples for how to easily implement these options.
1 Trade surplus is available only to select integrators on a custom pricing plan. For assistance with setting up a custom plan, please contact support.Try it out
Here is code for the demo app, feel free to use it to get started quickly for your own project: https://github.com/0xProject/0x-examples/tree/main/swap-allowance-holder0v2-next-app
Conclusion
By following the best practices outlined in this blog post, you can create a user-friendly and effective app that enables trustless token swapping on our supported chains.
Happy swapping!